Submitting Assemblies
Note
Files must be uploaded before assemblies can be submitted. See: Uploading Data Files.
Access the Assembly Page
Create a profile [1] following the steps in Tree of Life profile creation. Then, access the Assembly [2] page via any of the following methods:
Using the Component Button
Click  under the Components column for a
profile as shown below:
under the Components column for a
profile as shown below:
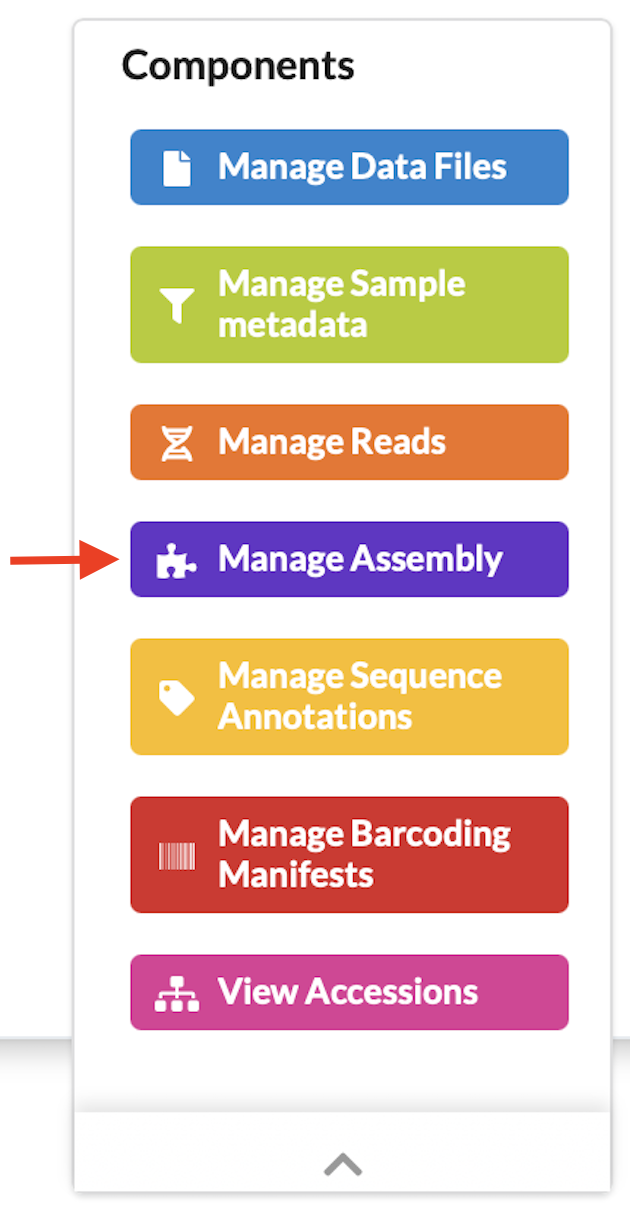
Button to access the Assembly page (highlighted)
Using the Component Icon Navigation Pane
If you are unsure what each icon represents, you can perform any of the following:
Hover over the icon in the component icon navigation pane to see a tooltip with the component’s name
Refer to the component button image above
Refer to the What are profile components? FAQ
Note
The navigation pane will not display the icon associated with the page that is currently being viewed.
If a component has subcomponents, a dropdown menu is shown when at least two items are available. However, if you are viewing a subcomponent’s page and only one item remains, that item is displayed directly in the navigation pane.
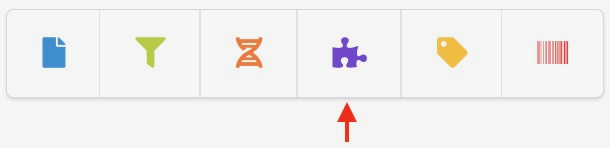
Navigation pane showing the Assembly component icon
Submit Assemblies
-
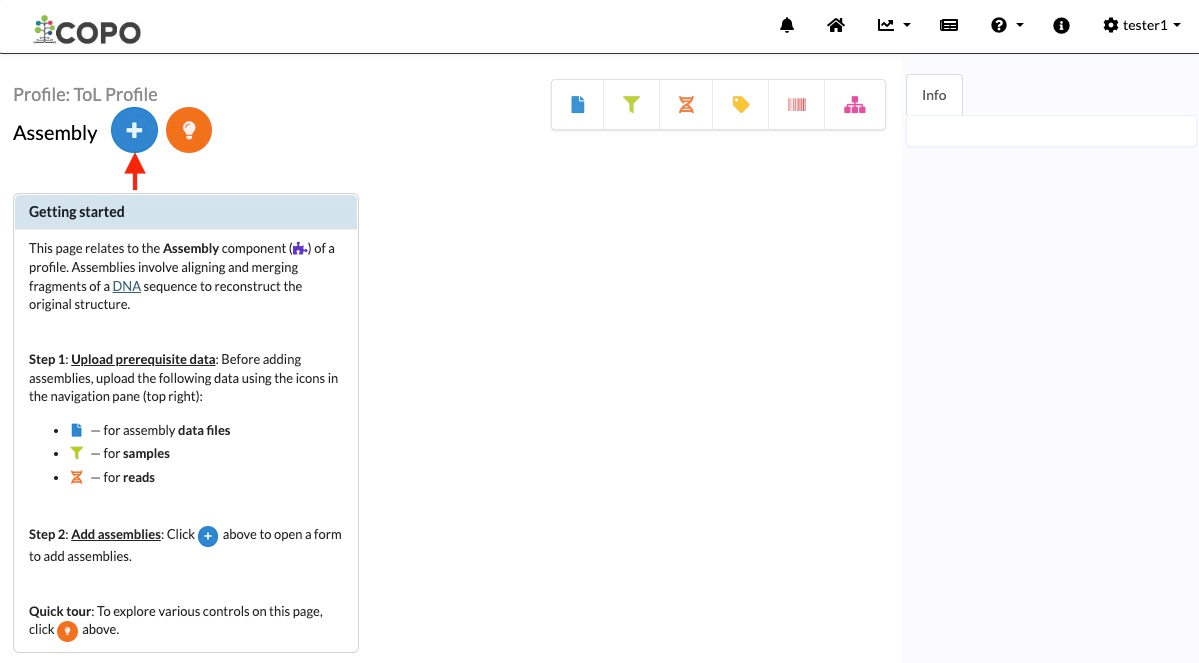
Click
 button to add an assembly as shown
below:
button to add an assembly as shown
below: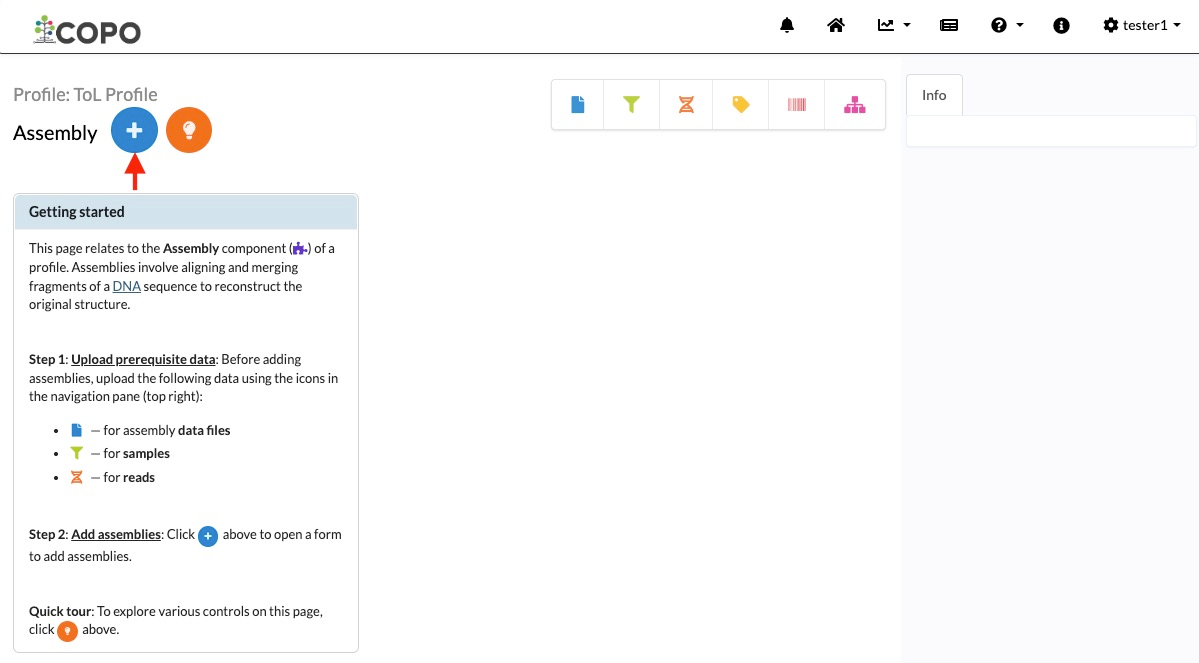
Assembly submission: Click the ‘Add record’ button
-
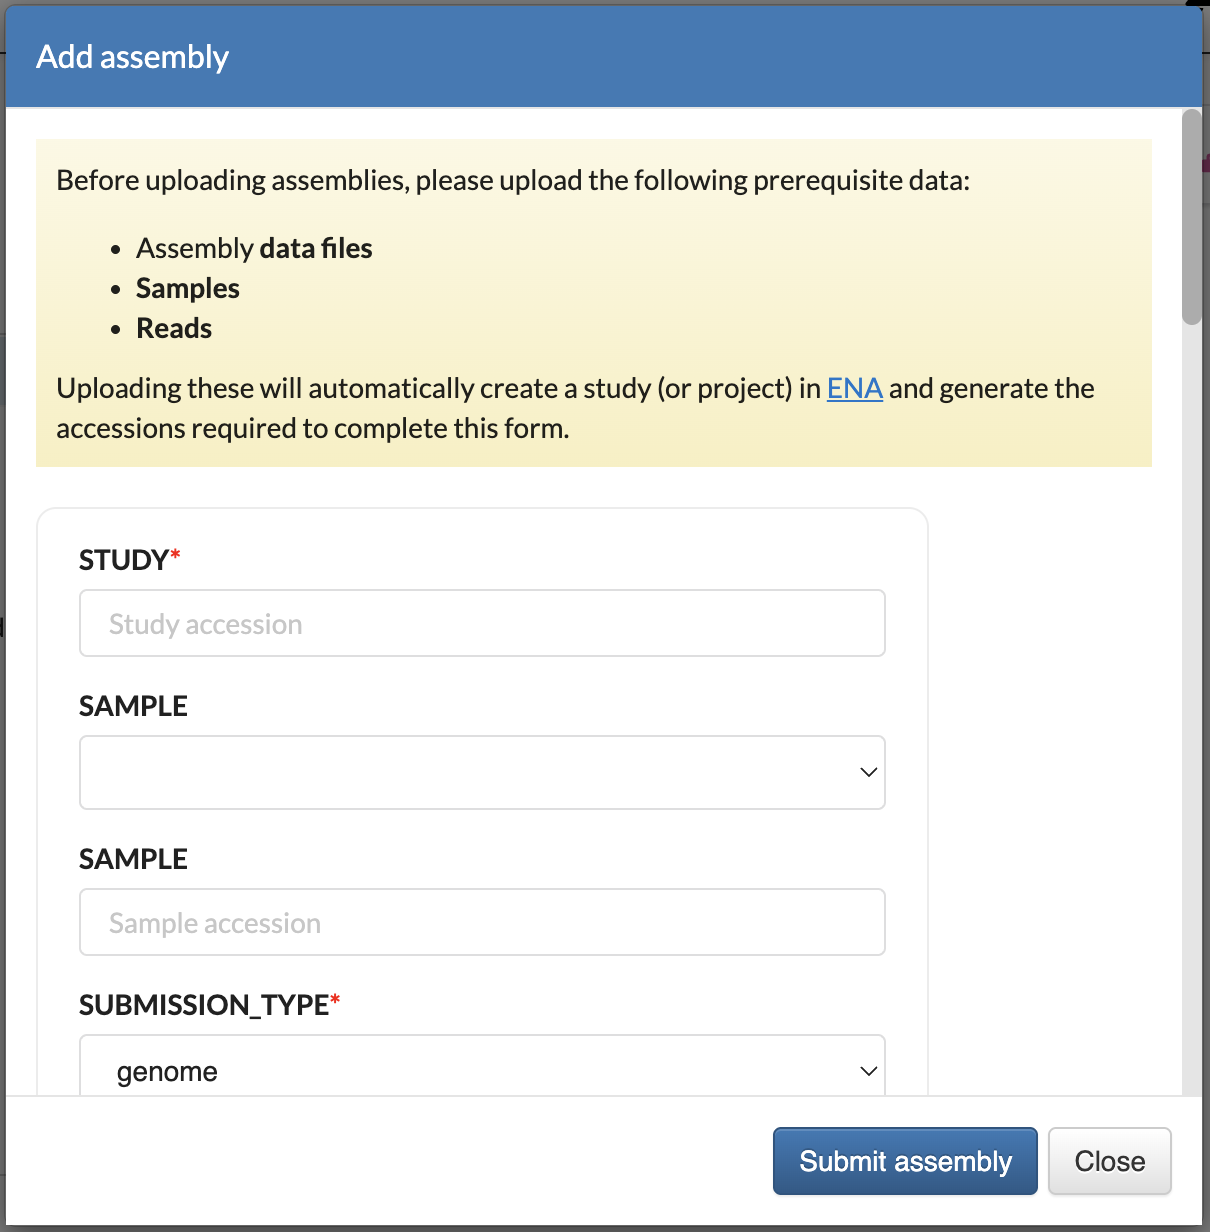
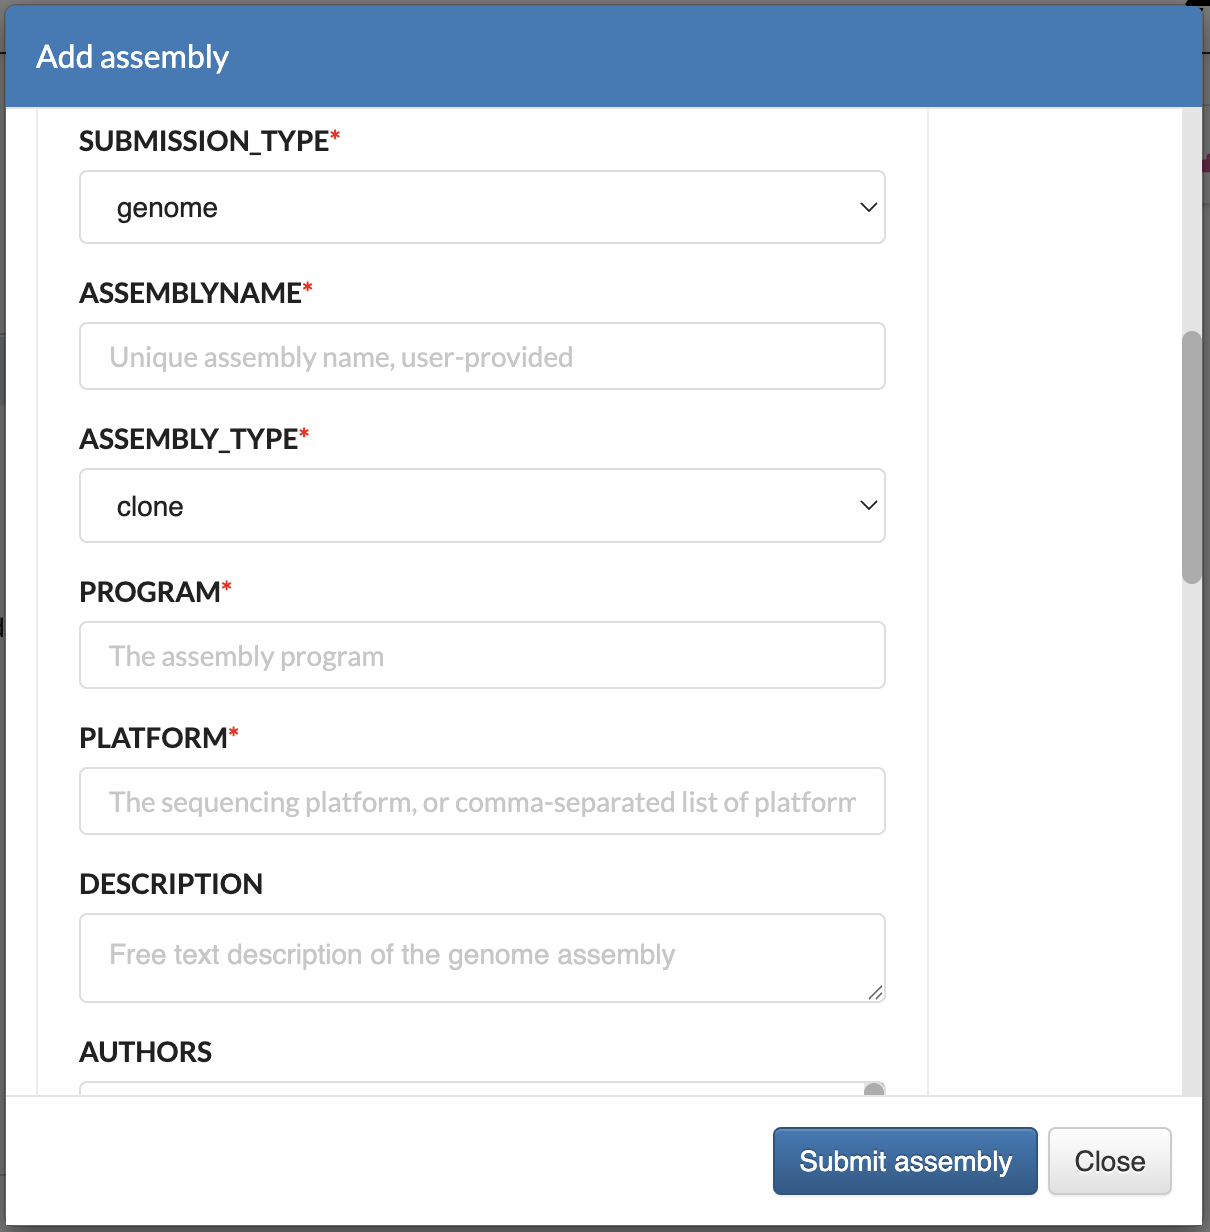
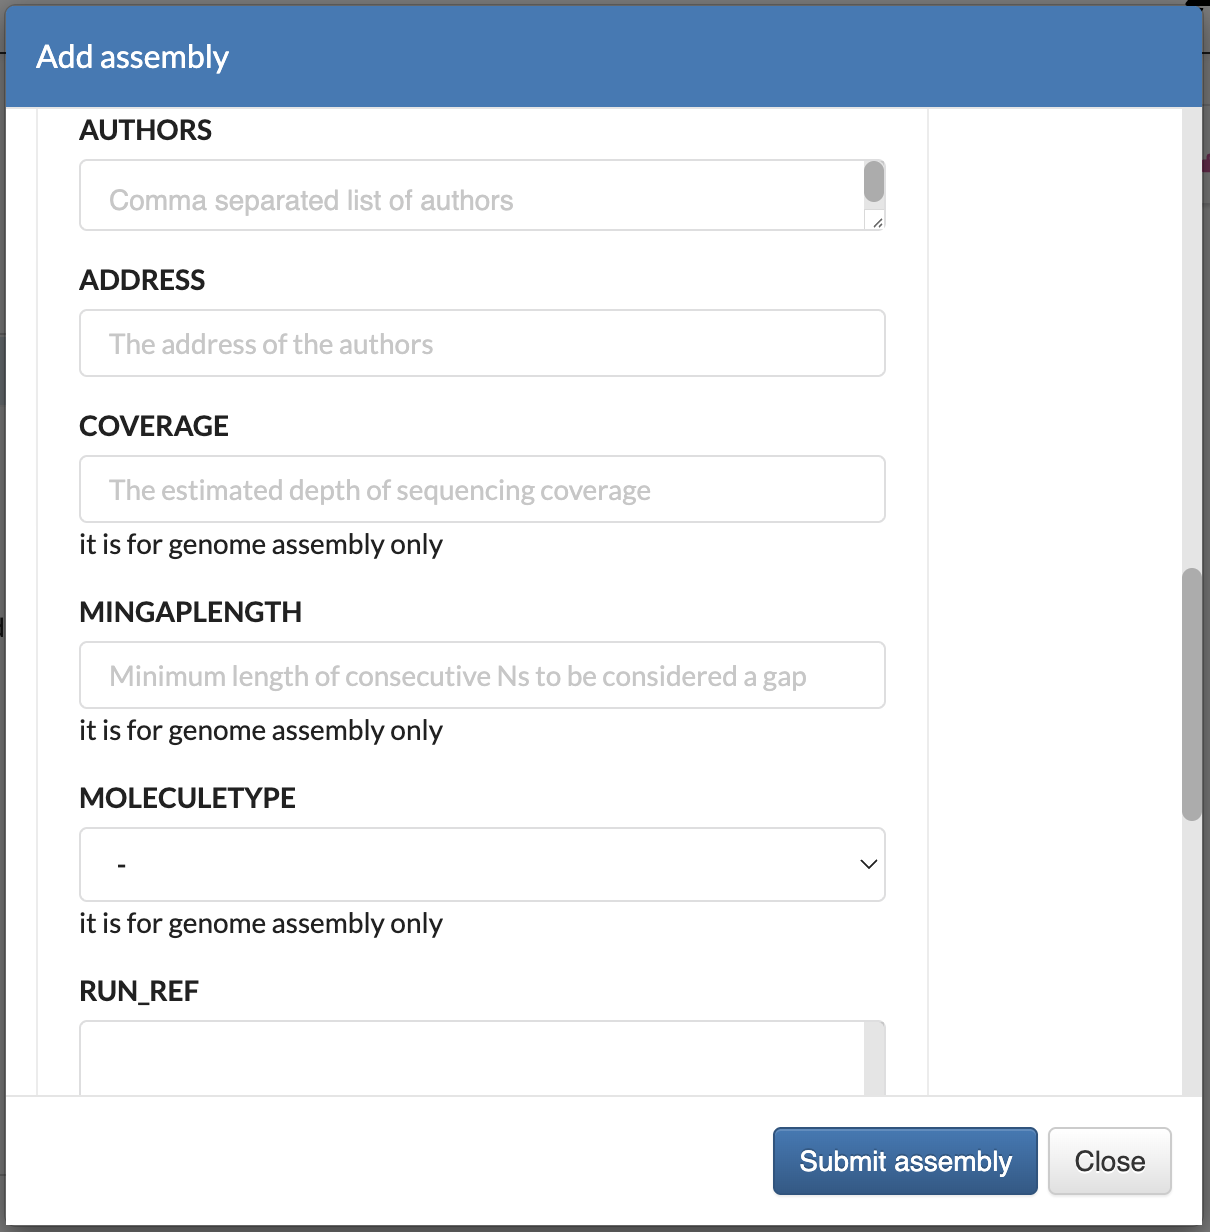
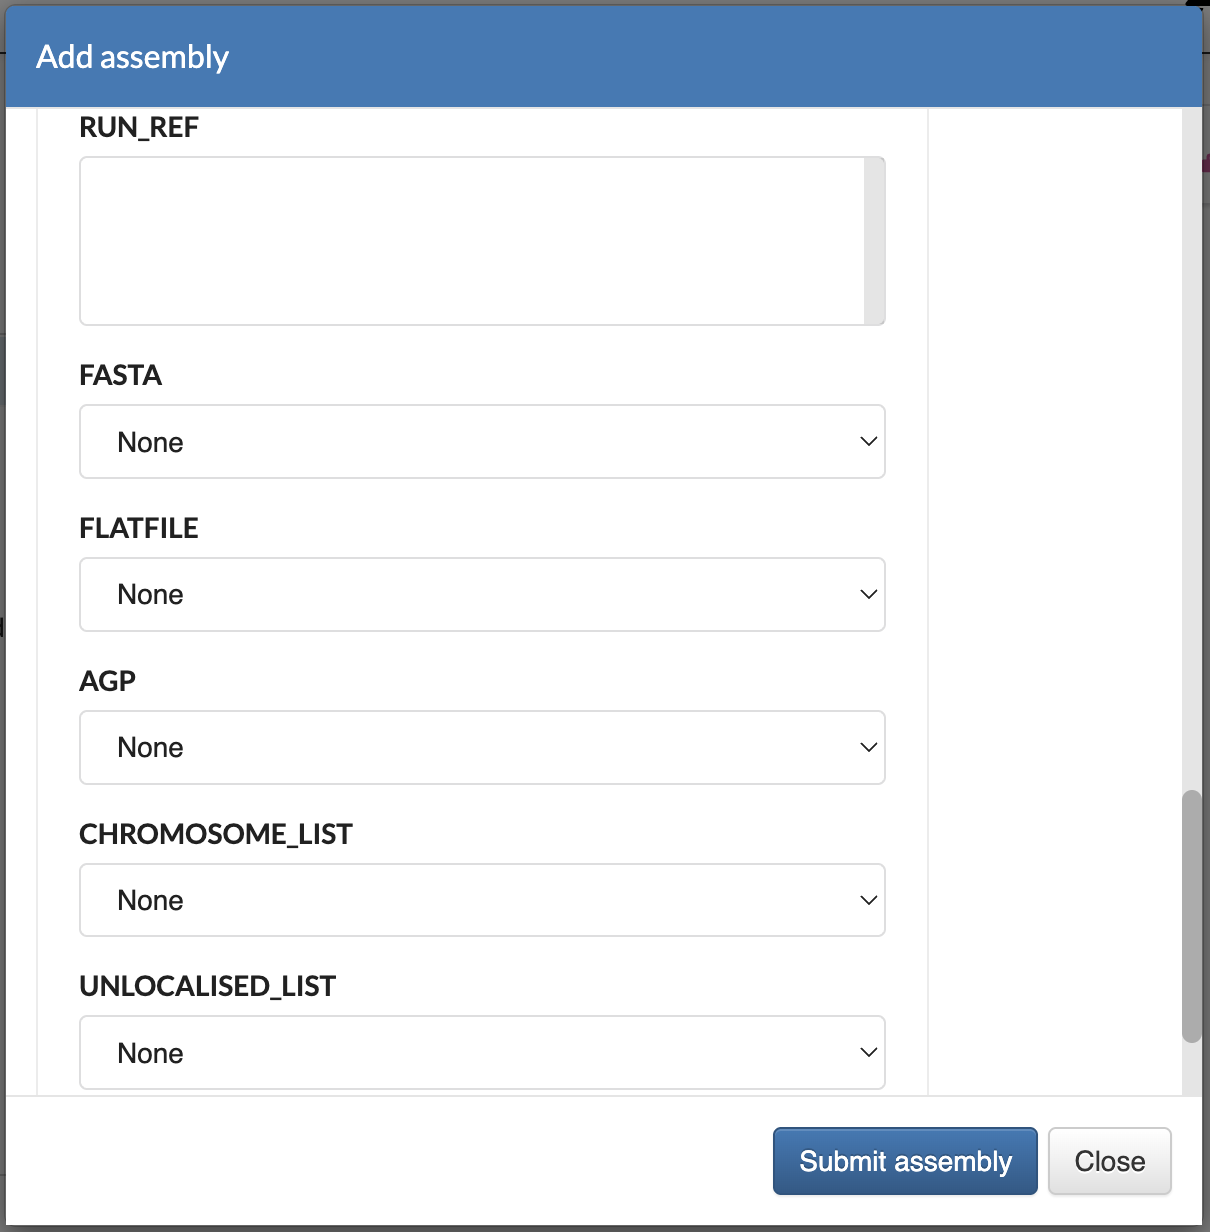
An Add assembly dialogue is displayed. Provide the details then, click the Submit assembly button.
Hint
An asterisk (*) next to a form field label indicates that the field is mandatory.
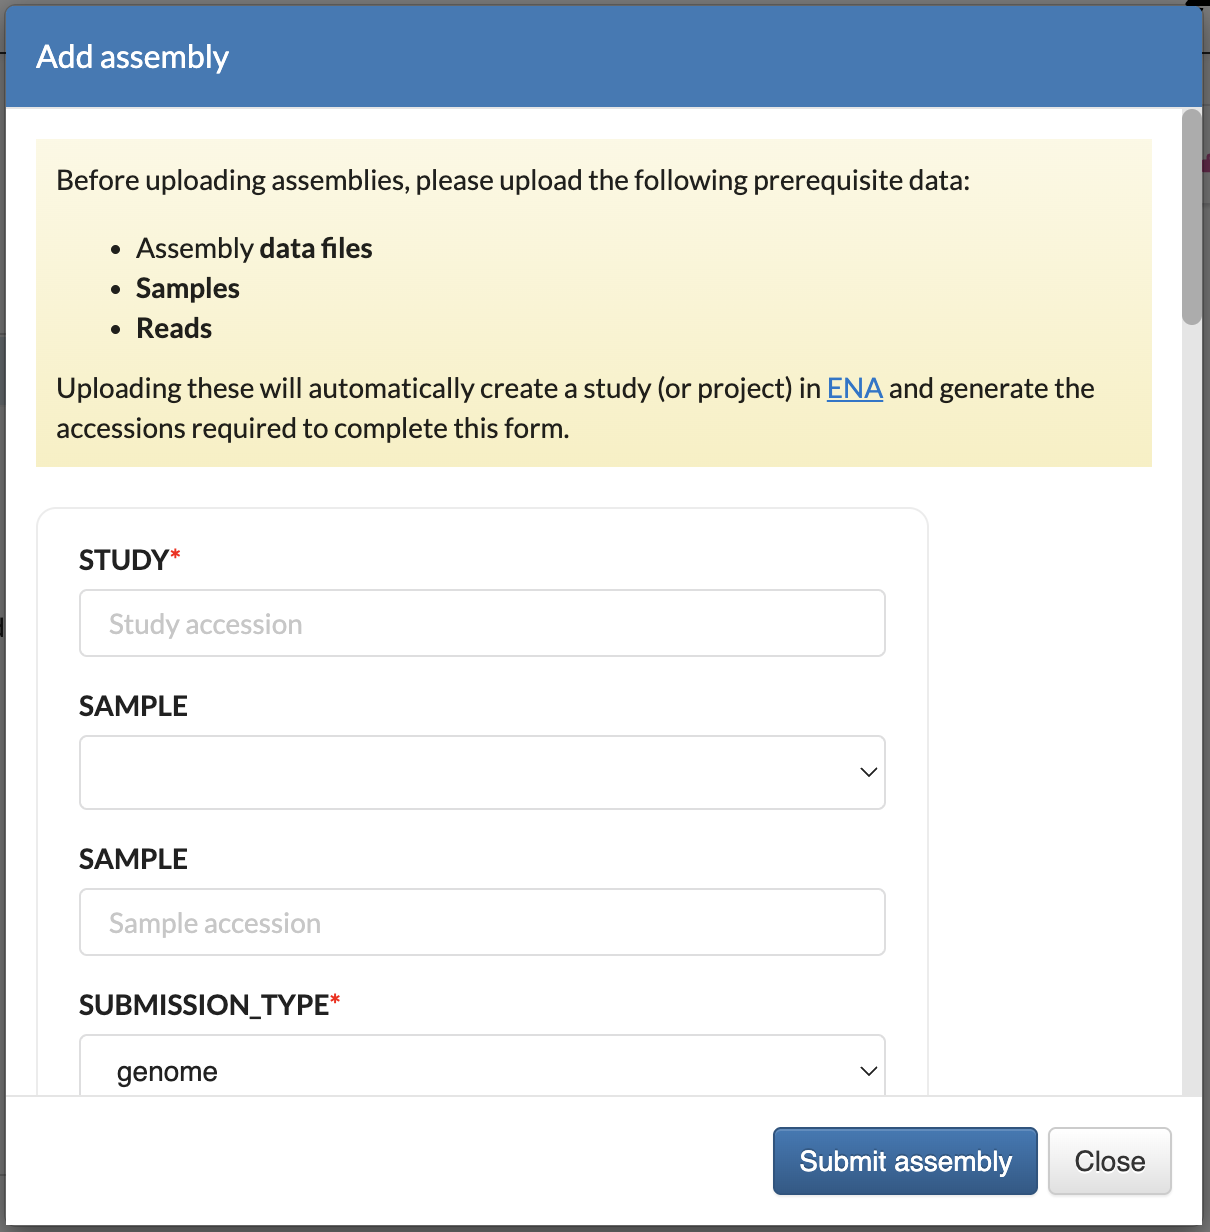
Add Assembly dialogue (top section)
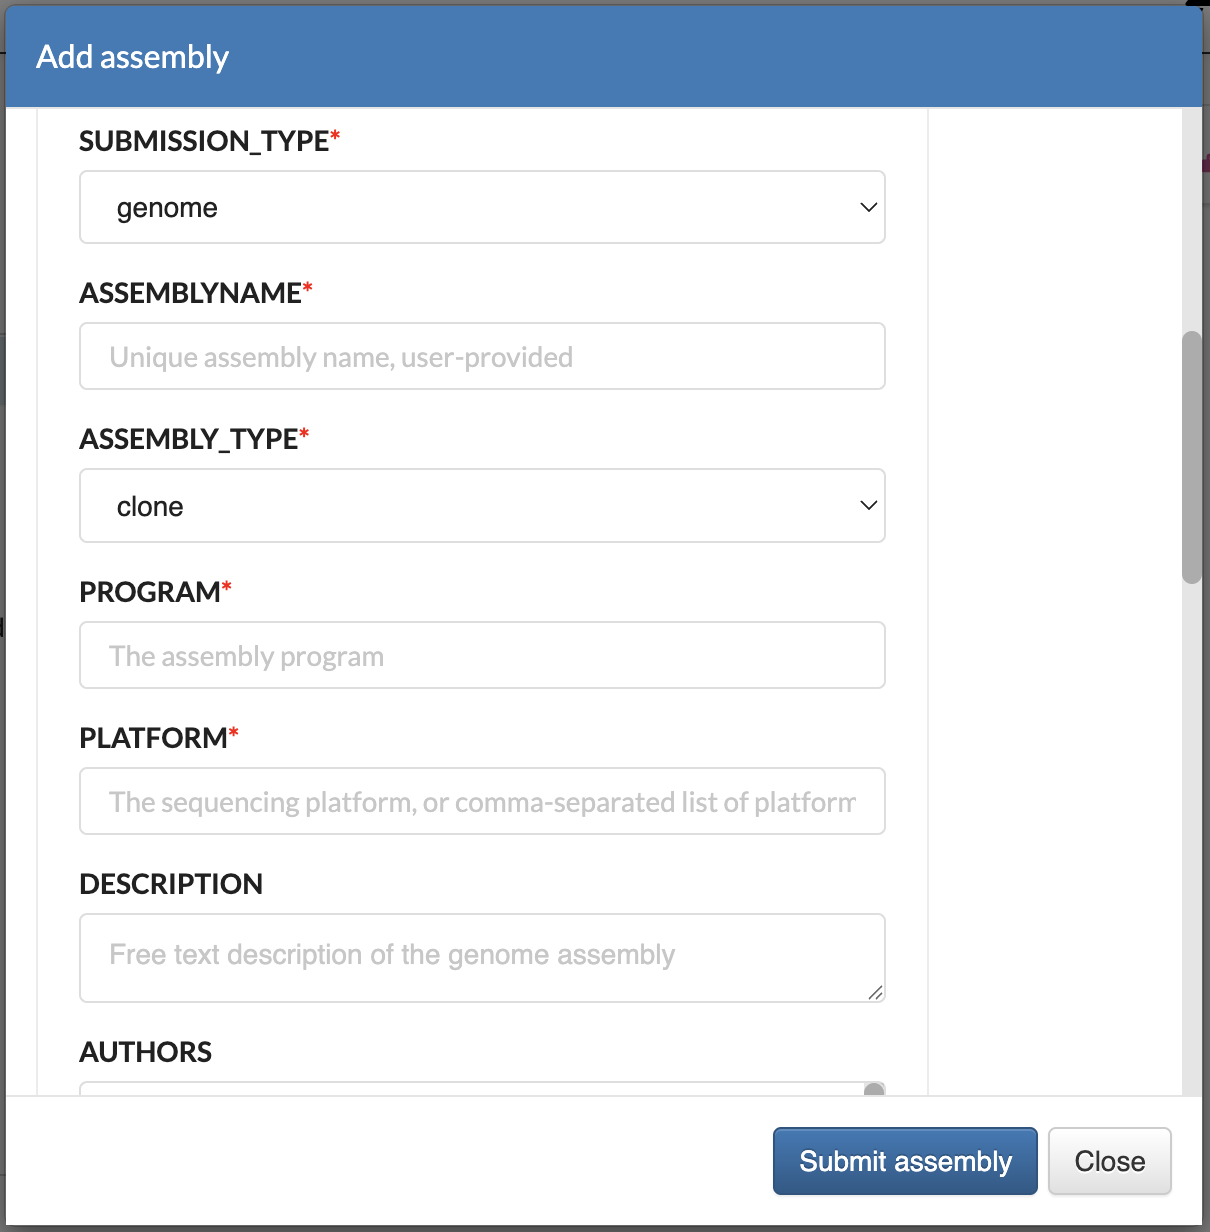
Add Assembly dialogue (upper-middle section)
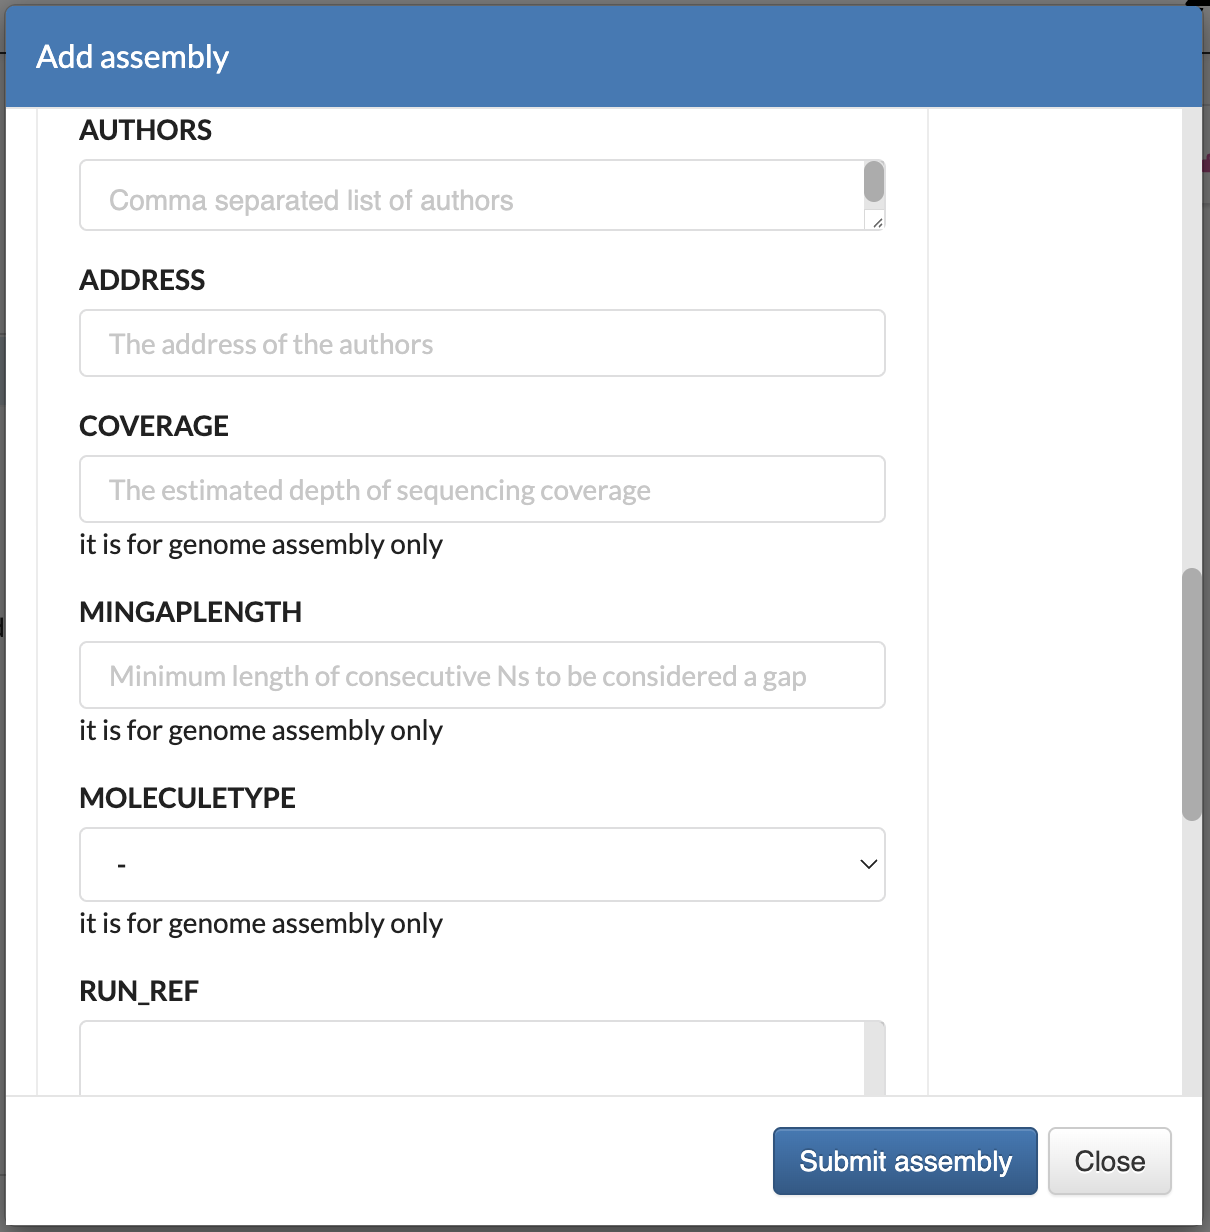
Add Assembly dialogue (lower-middle section)
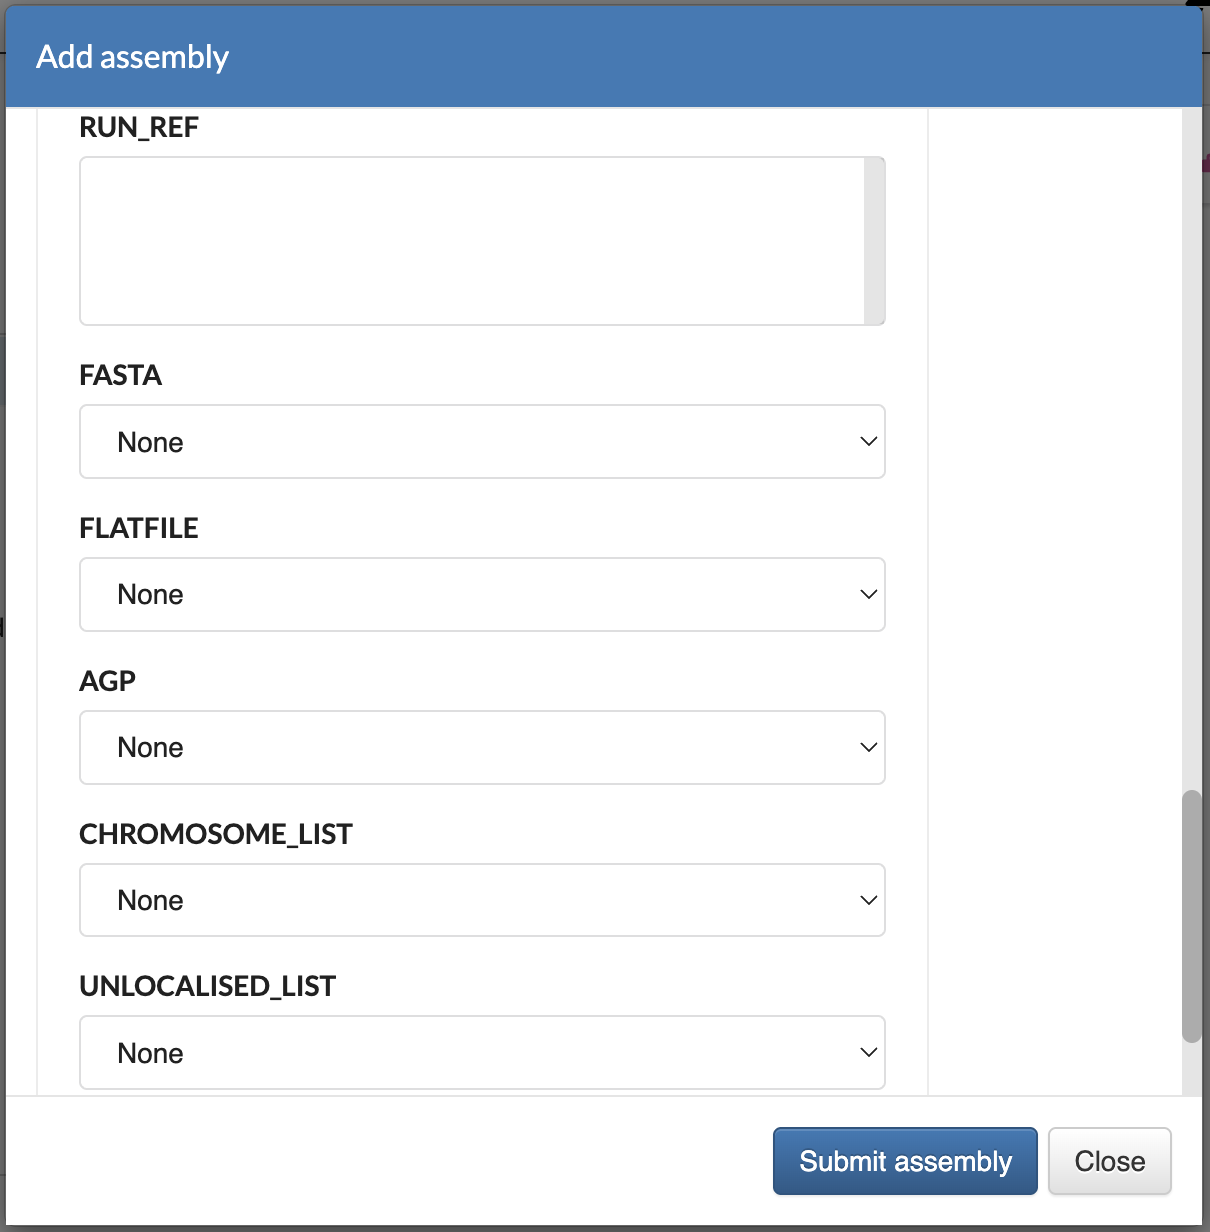
Add Assembly dialogue (bottom section)
-
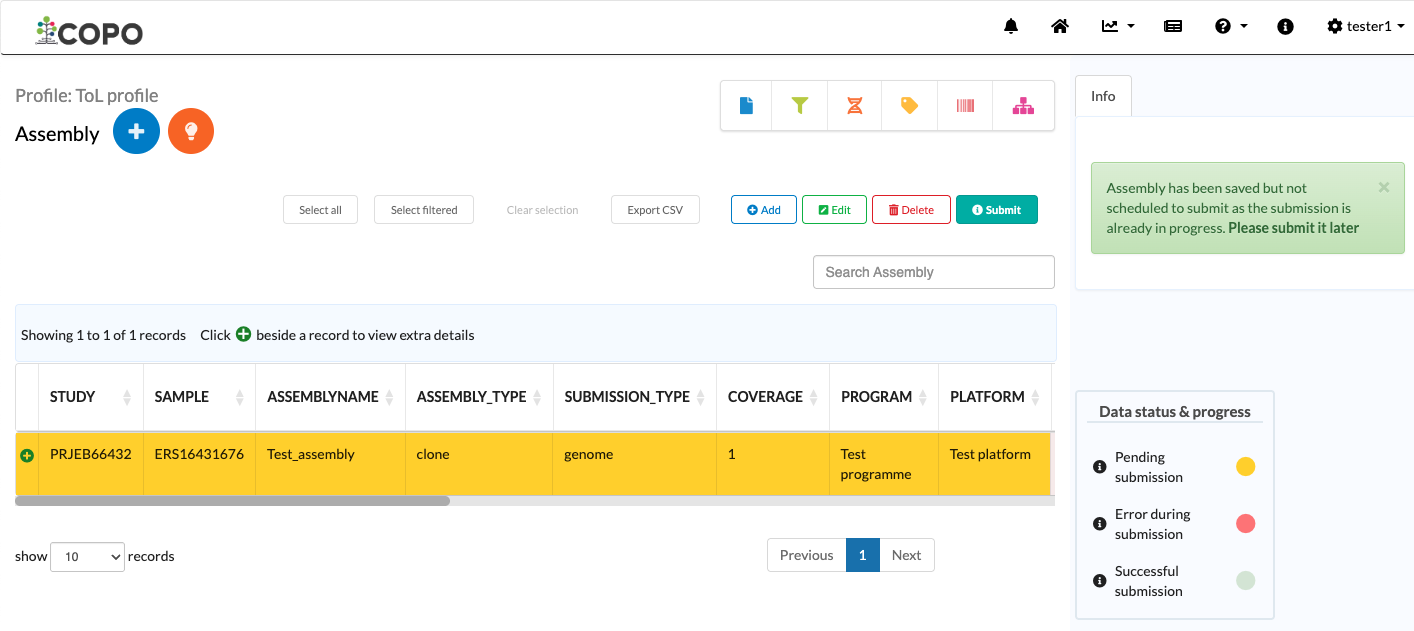
The new assembly will be displayed on the Assembly page after a successful submission.
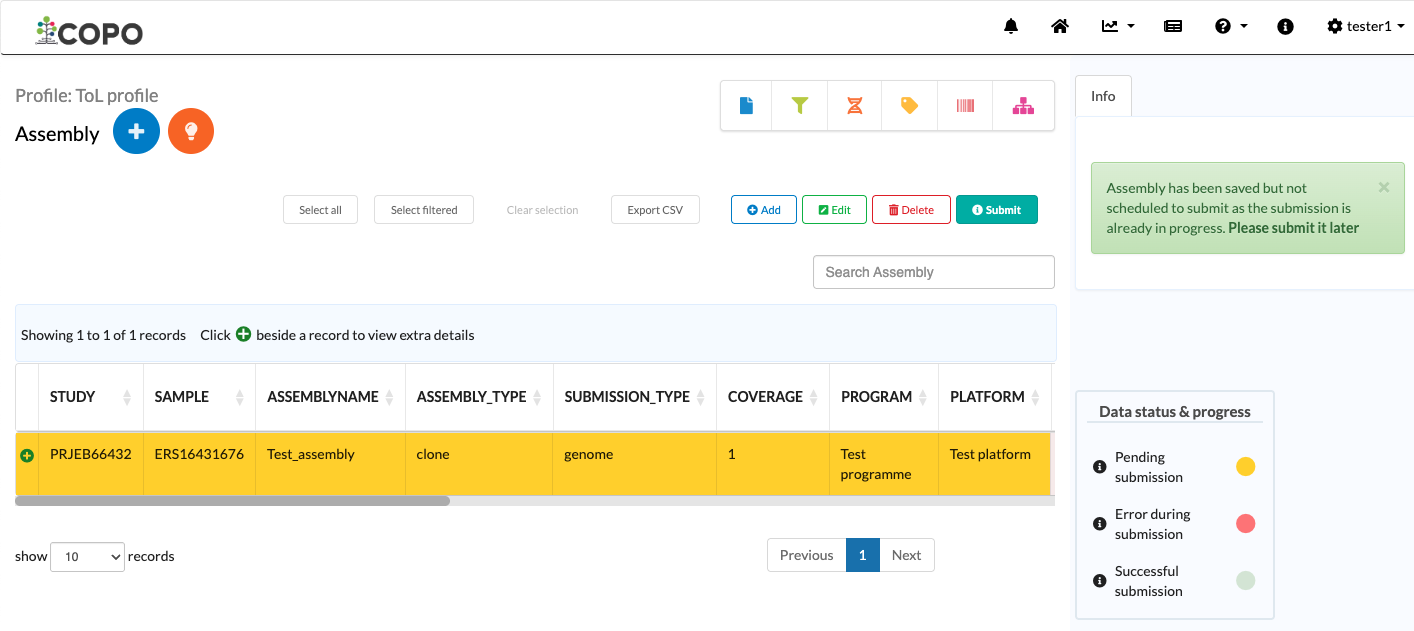
Assembly submission: Page showing uploaded assemblies
-
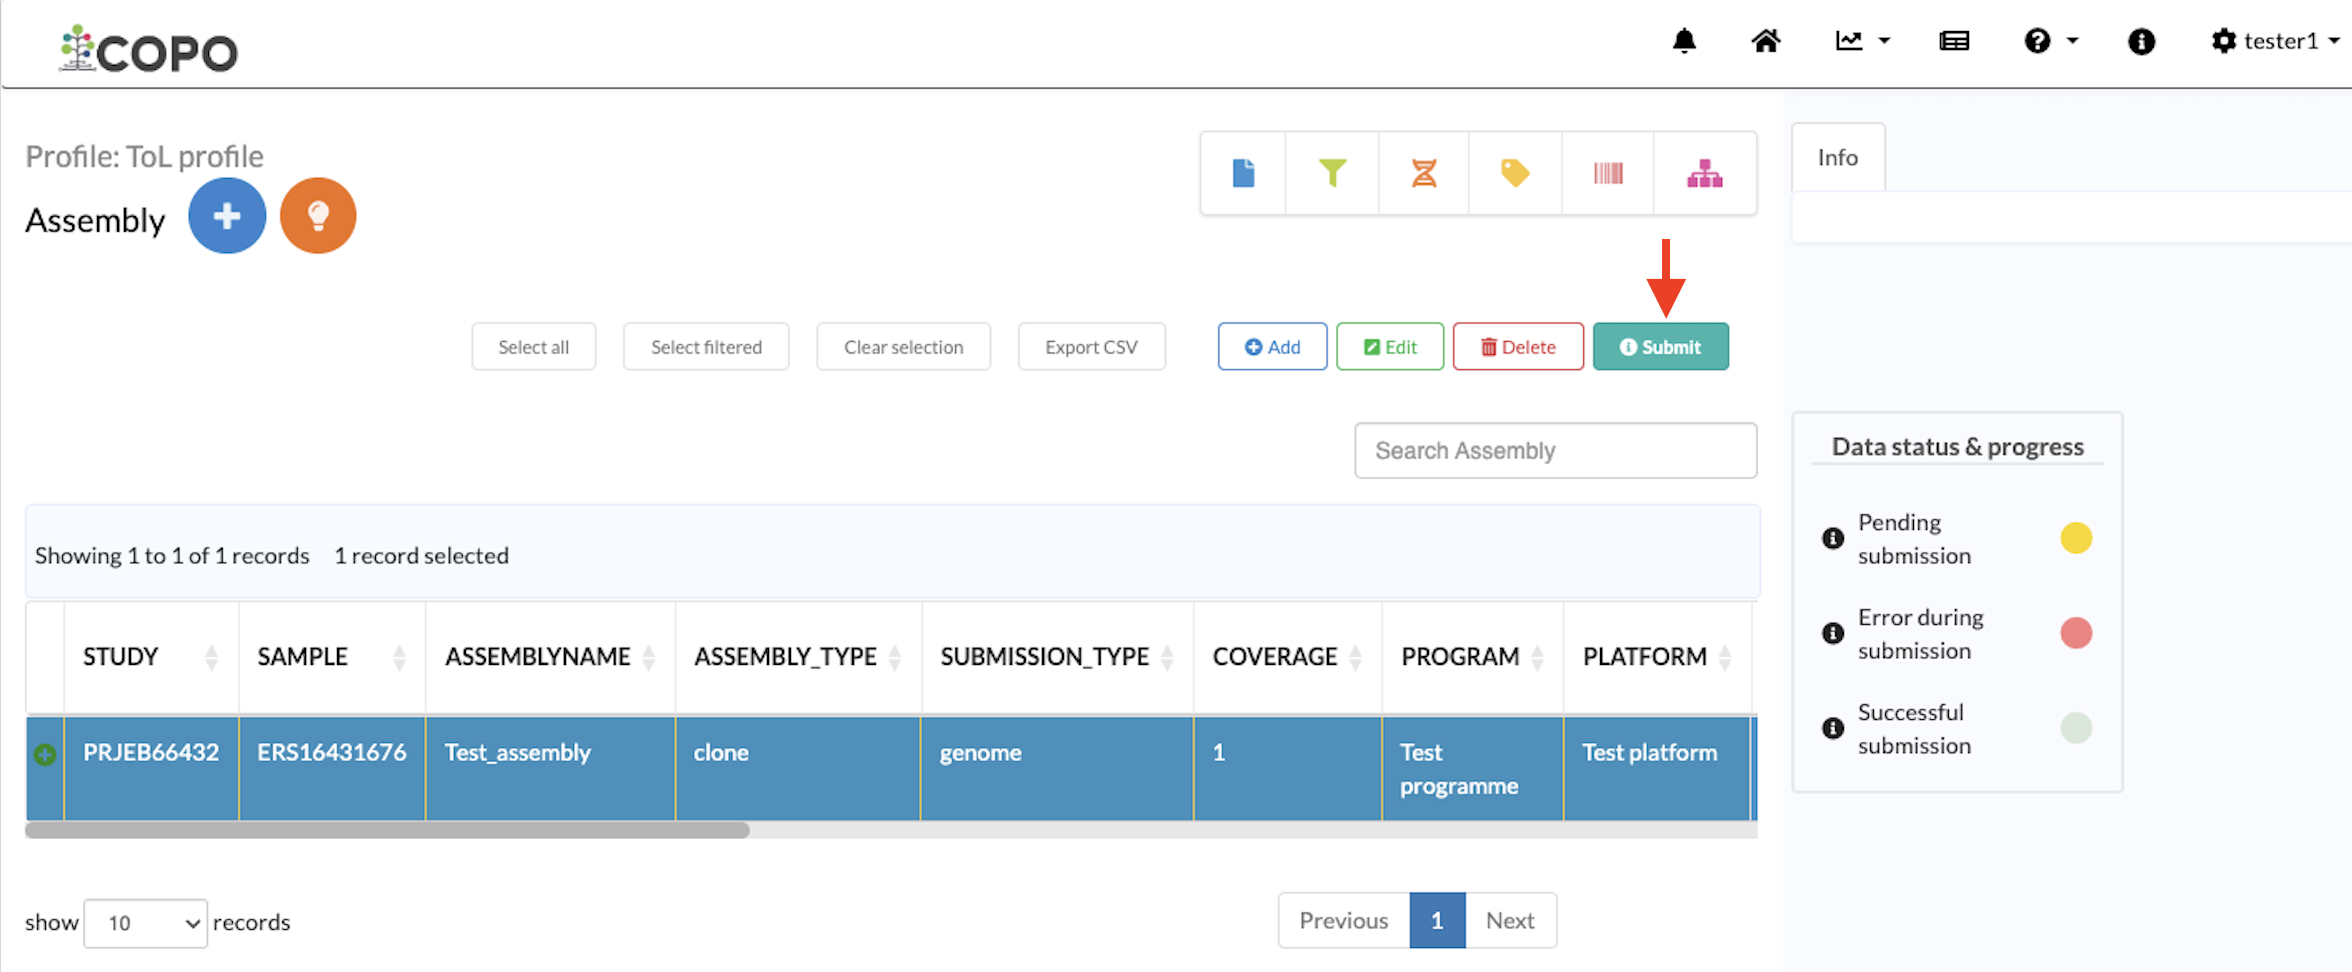
Click an assembly record in the data table on the Assembly page. Then, click
 located at the top-right of the table as shown
below.
located at the top-right of the table as shown
below.Refer to the View Submission Status section and View Accessions section below for more information about the submission.
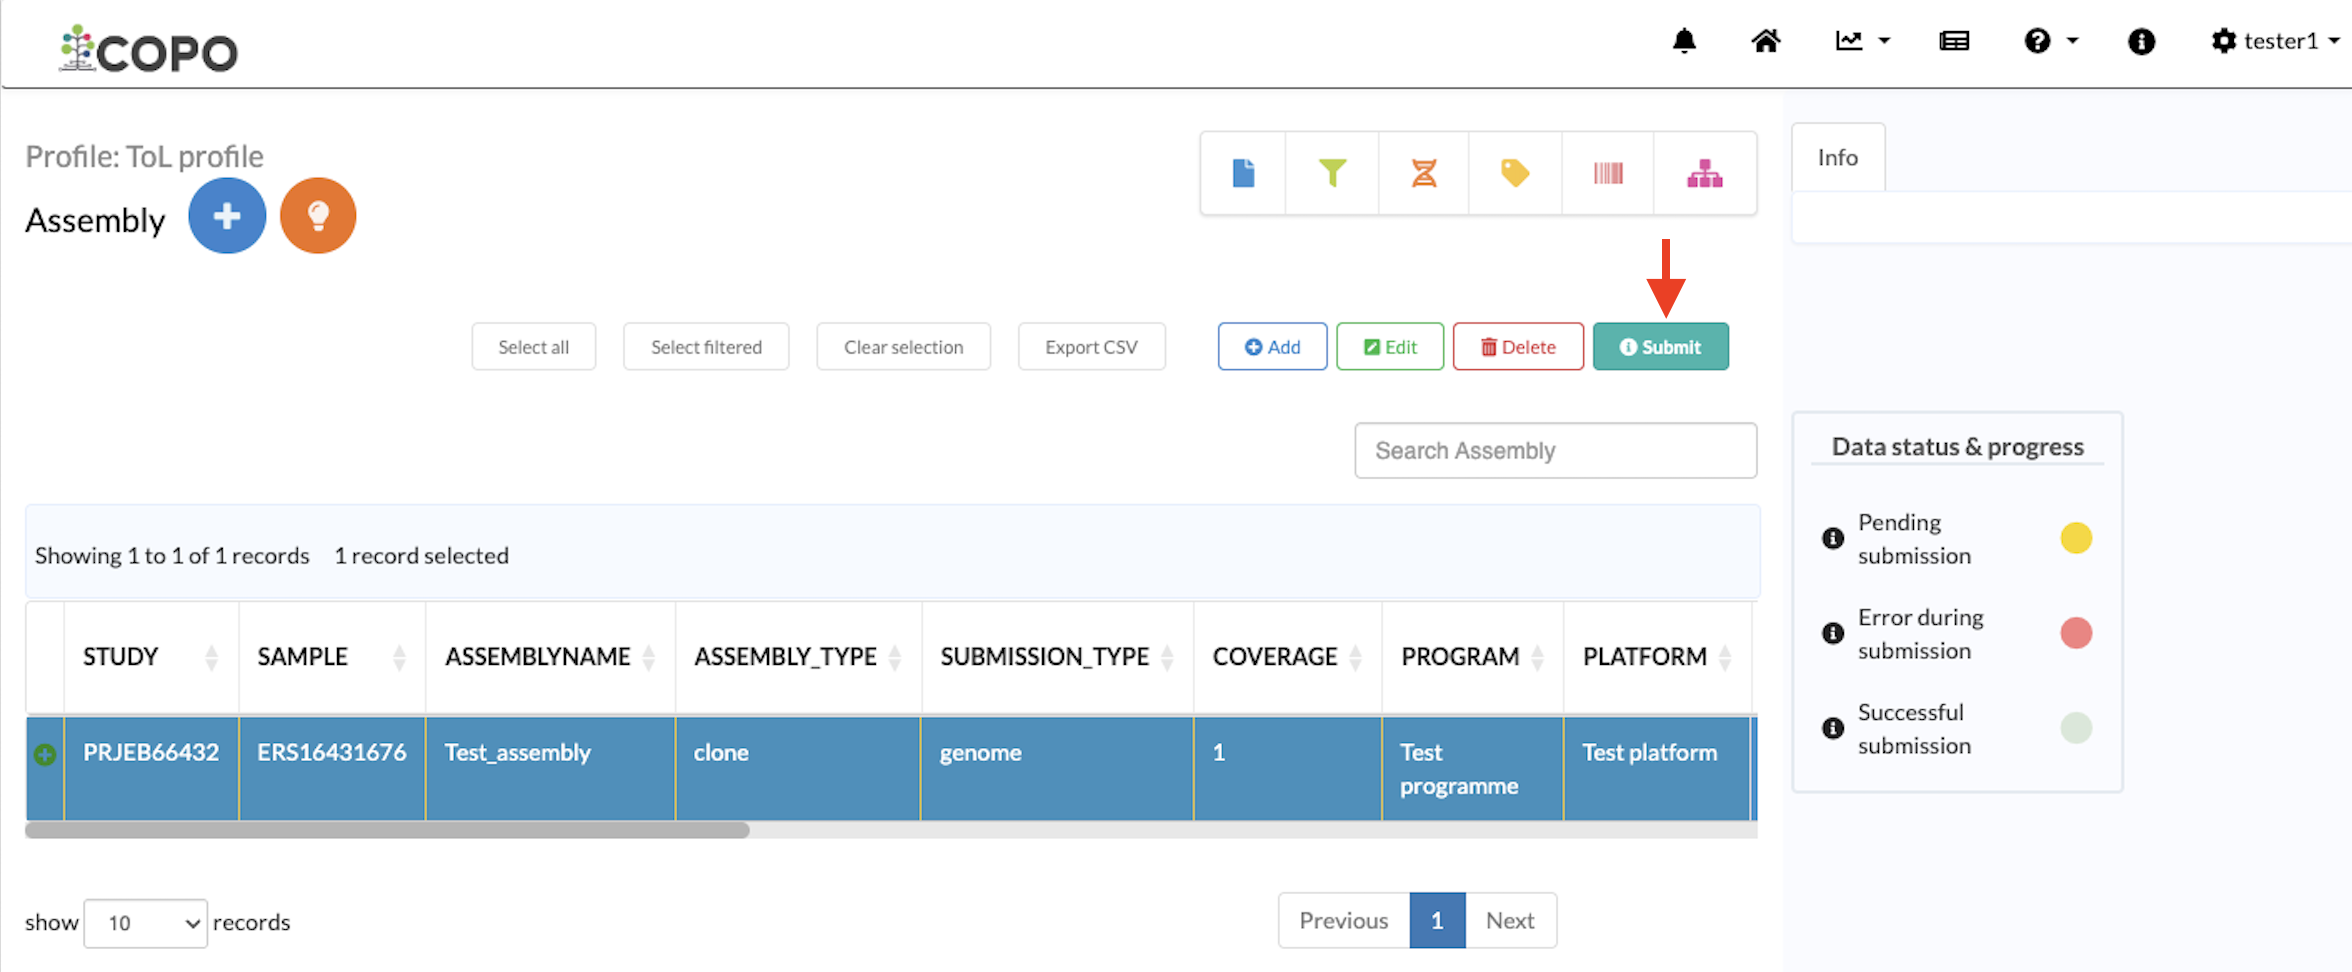
Submitting an assembly by clicking the “Submit” button
View Submission Status
Hint
The Data status & progress legend, located on the right side of the
data table, shows the different stages of submission processing. Hover over
the  to see description for each status.
For more details, see the How can I check the status of my data submissions? FAQ section.
The submission will be scheduled for processing after the
button is clicked. The row of the submitted assembly
record will be highlighted in green indicating that the submission has been
successful.
If the submission was unsuccessful or has not been assigned any accessions, the table row will be highlighted in red. Its status is indicated in the SUBMISSION ERROR column and the ENA FILE PROCESSING STATUS column displays the status of the data files associated with the submission.
View Accessions
Accessions are unique identifiers assigned to submissions after they have been successfully submitted to public repositories.
The accession columns are:
ACCESSION - Displays the accession assigned to assembly submission.
STUDY: Displays the ENA Study accession assigned to the project
SAMPLE: Displays the ENA biosample accession associated with sample associated with the submitted assembly.
RUN_REF: Displays the ENA Run accession assigned to the reads associated with the submitted assembly.
Clicking any accession in the data table will open the corresponding record in the associated repository. You can also find the same record by searching for the accession directly in the repository.
Tip
Alternatively, click the  icon located in the
top-right corner of the data table to navigate to the Accessions page
that displays accessions for all submissions.
icon located in the
top-right corner of the data table to navigate to the Accessions page
that displays accessions for all submissions.